Monday, May 31, 2010

Letters T and U

Two letters for ALaW 2010 using my two techniques: foldforming for the T; and metal beating for the U.


A lesson learnt from the foldforming of the T is that some recycled metal is of poor quality; or has already reached its limit in terms of bending etc. When I bent the metal for the vertical axis of the T it split when I opened the fold - and all that was done gently - honestly.
The U has some 400 circles punched on it with a small nail punch; then was hammered from the back; and then punched on the front with a wooden dowel to emphasise the convex look.
Both pieces were then gently polished to bring out the highlights but leave some patina behind.

Saturday, May 29, 2010

Rainbows and mountains - magic

Today has been cold, windy, cloudy and raining on and off - so it was a bit on the misery side of life. But just when you are feeling a bit glum nature can turn on a show.


The photos above were taken over a period of about an hour - the colour show just went on. The strange thing was that it all occurred during a cloudy and rainy period. After about an hour the wind appeared to blow it all away and we have been left with a cloudless blue sky with a weak afternoon sun.

But what a show - the lovely grey of the misty mountain in the valley, the brilliance of the rainbow (which had a weak double) and the dark rain clouds above. And what about the white clouds floating behind the rainbow? Magic

Friday, May 28, 2010

ABMT Auction

As you know from earlier posts Fiona and I committed to exhibit a couple of works in the Australia's Biggest Morning Tea event yesterday (7 June) organised by Kim S at MainStreet Gallery in Montville. Congrats to Kim, MS Gallery and the great team of people who did so much work behind the scene and on the day . The effort generated quite a few thousand dollars for cancer research and support.


The photos above show Fiona's and my 'teapots' on display before the auction took place. In all there were 35 works of art donated by artists for auction. Pretty amazing effort. All works had to have a tea theme.

As you know from earlier posts my tea pot was a small ceremonial piece made from found brass and copper objects. The good news is that both of our pieces fetched good bids in the auction and therefore made a good contribution to the fundraising on the day.

The auction process was a bit nerve racking as: it was a first for me; you never know if your piece is up to scratch; appeals to the buying public; and if there is enough cash around to attract bids. My piece was lot 30 so I also wondered if auction fatigue was setting in. But in the end all was well.

Tuesday, May 25, 2010

Needed to do something creative

17 May seems a long time ago from an art injection perspective - that was the last time I was able to get down into the studio. Not that Fiona and I have not been doing art related things including: doing our portfolios for the Sculpture on the Edge (Lucas Parklands Exhibition); doing art planning; doing paper work for the next COMA exhibition; showing visitors the studios and our art etc etc. But nothing quite replaces a bit of hands on creativity in the studio.

So this afternoon I had just under an hour before preparing dinner so I decided to do a small contained project. Recently I have assembled a couple of small incense burners for friends so I thought I would do another. I find this a good way to use smaller bits and pieces that don't usually find a home in my bigger pieces.


Whilst I did not finished the project I did make a reasonable start. It looks like a miniature candle holder. It is about 125mm high and the 'bowl' is about 75mm.
I have used pieces from an old light fitting; scraps of copper and brass; and heavy copper and brass bushes it had in the stash. I have yet to sort out the top so that it will hold an incense stick or so that an incense cone can sit on the top of the centre piece. Then it will need a grind and polish. With a bit of luck that will happen tomorrow.

Friday, May 21, 2010

Webs in the mist

During breakfast this morning I was looking at the mist rolling through our breezeway deck thinking how cool it was to be in the clouds and having them float through the house. I then saw that the mist was depositing moisture on the webs of lots and lots of tiny spiders that had made their home on the wires of the railings. The webs are all about 100mm across and the spiders are about as big as a pin head. A gentle breeze was making them billow like small jewelled sails or convexes.


The photos above show just one section of the many webs billowing in the direction of the breeze. The close ups show the delicate nature of the webs and droplets of mist, the tiny spiders and the trees through the mist.
Once the mist and breeze went you could hardly see the webs or the spiders at all - just one of those passing moments.

Monday, May 17, 2010

Some people shine

Today I attended the funeral of a relatively young man. I did not know him really well. He was a person with whom I regularly exchanged greetings and the odd enquiry - but all the same someone whom I recognised as part of the fabric of my life in Maleny. The funeral service was a sad but rejoicing affair. The thing that impacted on me most was the story of his life that unfolded throughout the service revealed a person who had touched the lives of many many people in many different ways. In a sense he shone gently though out life and he gave gentle positive vibes to many. I thought I would dedicate my letter S to him today - S is for Shine and he was a person who shone.


I put a bit of effort into texture on this letter. I have punched a series of small circles on the front; ans a series of larger ones from the back to outline the letter. I have beaten the letter with a small rounded hammer from the back to get the raised but textured look; and used a small sharp edge hammer to beat in the marks around the letter on the front to get contrast.

Sunday, May 16, 2010

Steel (rusted) and timber post sculpture

For sometime I have been working on a sculptural piece called Droplets for the Lucas Parklands Exhibition. It is my biggest, or at least heaviest, post sculpture to date. It is 1.2m high by 330mm square; and needs two people and a furniture trolley to move it around.

As you can see from the following photos it started as a large log of rough milled salvaged rose gum hard wood which I have cut to shape and size with our chainsaw. The rusted pieces of sheet of mild steel came from the bottom of a trailer; and the rusted cutout cylinders given to me by Kim S.


After much grinding, sanding, beating, drilling and nailing Droplets has come together.


A closer inspection of the photos reveals that a triangle motif is repeated on the piece.
On back and top of the sculpture negative and positive space triangles gather the droplets of water and funnel them down into the triangular bowl at the bottom. I think the sculpture has a real presence and should sit well along the rain forest walk in the Lucas Parklands garden.

Saturday, May 15, 2010

Beaten foldformed copper bowl - on the square

I had an hour before dinner last night to do something creative that was not part of any exhibition etc so I thought I would give myself a buzz by creating a small hand held meditation bowl.

A couple of months ago I did a bowl for the Super Bowl 2010 Challenge from a square of recycled brass. I wanted to see how well I could repeat the process with a square of flat sheet 1mm copper; and take it a bit further by putting a bit more thought into creating texture through the beating process.


The bowl is simple and unadorned. It was made by first punching the square into a wooden form; and then beating it with two different hammers. The punching process creates the basic bowl with foldformed pleats in it. A lighter pointed hammer was used to create a more textured bowl in the base; and a heavier ball hammer created the texture on the sides. The copper has been polished with medium steel wool.

Friday, May 14, 2010

Pearl shell part 2

Whilst I rejected Fiona's suggestion about cutting up the pearl shell using a 100mm side grinder with a cut off blade attached on the grounds of 'overkill'; I did think the idea could work if it were downsized. So I decided to take a similar approach with a Dremel tool and mini cutoff disk.

I did a bit of a test run in the garage last night. Two things: it worked as you can see from the photo below; and second don't ever cut up pearl shell with a Dremel inside. The amount of shell dust was amazing; and a smell similar to rotting seaweed that was emitted as the shell was cut was really bad. The smell was so bad that Fiona just put her nose in the door and immediately bolted upstairs.


Today I set myself up outside well away from the garage and in a spot that got a breeze.


As you can see from the photos below there is good and bad news: the good news is that the cutting process worked; and I managed to cut both the round pearl shapes out successfully. The bad news is I dropped one of the pieces on the bitumen driveway and chipped the front of the pearl. Another lesson learnt: put down some carpet when working with pearl outside on the driveway as it is just so soft.


I will send the pieces on the left to a friend; will keep the chipped piece as a reminder; and will give Noela and Brigit some of the off cuts below to play with.
And another conclusion I have come to is that I don't really have the patience to be a jeweler if it involves using the hand saw; but if I can use the Dremel etc then I could give some chunkier pieces a go.

Thursday, May 13, 2010

Learning a new skill - cutting pearl shell

Many years ago I was given a couple of beautiful large pearl shells with 7 pearl blisters in place. I have had three of these blisters made into a pendant and earrings for Fiona. However whenever I have taken the shells to a jeweler to have the other blisters cut out so that I can give them as gifts to friends; and to harvest other interesting elements of the shells the response has always been - too hard, too labour intensive, too expensive and takes too long.


I discussed this matter with Birgit W a jeweler in our town. She said "why don't you cut them yourself?' She offered me a jewelers hand saw (her own original saw in the photo); and purchased about 20 blades for me - extremely fragile in my mind. She also gave me instructions regarding loading the blades and starting the cut.


As you can see I made myself a small cutting platform; marked out a test pattern; and got into it.


And I discovered - yes it takes a long time to cut thick pearl shell with a jeweler's saw. You see from the detailed photo of the shape I cut about half way around the shape; and that took about three quarters of an hour. Fiona has suggested another option - cutting it up with a cut off blade in my angle grinder - a bit of overkill - but I will investigate options and keep you posted.

Tuesday, May 11, 2010

Hanging pumpkins on the mountain

I know that there are some regular pumpkin followers out there who are just waiting to see what is happening with the pumpkin crop on the block.

Well I have to inform you that the saga goes on - the pumpkins continue to grow. However, you can see from the photos that the vines are beginning to wither with the cooler weather; and the size of pumpkins is getting a little smaller as you can see from the give away stash at the front door.


Because they are all ripening at about the same time I have needed to put some into storage. It was suggested to me that hanging them in a hammock was the way to go - plenty of air to circulate around them. You can see from the photo we now have hanging pumpkins in a hammock given to us by Mark and Caroline. I will let you know if this actually works.

Monday, May 10, 2010

Chunky-bum beaten metal letter R

As you may be aware that Fiona is the calligrapher in our household not me - so my letters for the A Letter a Week 2010 challenge are often a bit odd in the proportion and form departments. So maybe Fiona's comment about my letter R being a bit of a "chunky-bum" could, and I only suggest this is a possiblity, could be correct.

Anyway, what I was attempting to do with the R was practice using the same hammer to beat the metal from both sides to create the reverse effect. The background was to have the indents and the letter itself would be in relief from the background.


The photos show that I have achieved this in a rudimentary way. And I was able to use the $8 hammer that I bought from the community market to do the work.

Sunday, May 9, 2010

Recent exhibition sales

As you know from earlier posts I have exhibited a few pieces in a couple of exhibition over the last two weekends: the Figs in the Forest exhibition at the Wood Expo; and the Earth Dreams Magic (EDM) book launch and associated mini exhibition in Montville.


The photos above show Pam M at the book sales desk with a great selection of Jim's and Hetti's art behind her. The other photo shows Fiona's and my work. The books and wall prints etc are Fiona's; and the beaten metal bowls and small wood and metal etc desk sculptures are mine.


At both the exhibitions I have been fortunate to sell a couple of my desk sculptures. At Figs in the Forest I sold one of my Erosion series (recycled timber and rusted iron rod); and at EDM I sold a piece called Tension (recycled timber, brass and Echidna quills).

Friday, May 7, 2010

Rusted cube with mountain

I have had a great Friday afternoon in the studio-garage. I have wanted to get into the piece I have planned for the next COMA exhibition; and progress my large post piece called 
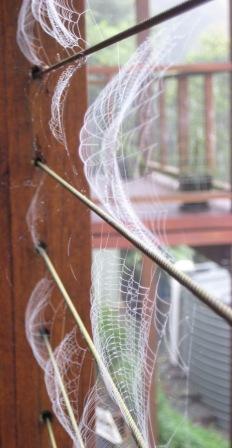
Droplets (of rain) for the Lucas Parklands exhibition. And the good news I was able to do both.

The COMA exhibition is called "... scratching the surface"; and Ken (COMA coordinator) has set the rule that COMA members who are exhibiting can do a small 2D piece (5"X7") or you can do a 3D piece up to 7" cubed. The cube of course appeals to me. My starting point for my piece has been to create a rusted metal cube.
If you check out the photo you can see that I have clad a 150mm cube of Blackbutt timber with 150mm square sheets of rusted 2mm steel (in a former life it was the bottom of a trailer). I have a new cutting tool - it is capable of cutting metal up to 3mm - but that is tough work - even to cut the 2mm steel is a reasonable challenge.
All that aside I really like how the cube has turned out. I will leave it cure (rust more) outside for the next couple of weeks before doing my 'scratchings' on it. It has also been a beautiful sunny and fine day so it was good to take a photo of the cube with the Glasshouse Mountains in the background.

Monday, May 3, 2010

Metal bower for the birds

In an earlier post I reported that I was working on a metal bower that reflected the courting area used by the Satin Bower Birds that live and breed in our neighbourhood.

Well after much binding of metal rods together with wire the bower has finally come together. And by the way Suzi in the end there was not such a great amount of 'playing' - the wire tying was pretty tedious. Noela - I don't think I will be adding any twigs.


As you can see from the photo above the bower is made up of a central platform and the arch - which in reality is a series of sticks that are upright and running off at various angles.


The male Satin Bower Bird usually decorates the central platform with blue objects to attract the female. I have used some paper clay leaves made by Ken Munsie and glass beads just to give an idea how it might look in the LucasParklands Exhibition setting. If time permits I will create blue bits by doing some enameling.

Sunday, May 2, 2010

Metal letters for April

As you know I am taking part in the A Letter a Week 2010 challenge. ALaW is a creativity challenge that is meant to offer one the opportunity to at least do one small (7cm square) piece of work a week; and to take the opportunity to try new things and to share then with like minded people. The aim is to complete 2 alphabets over the course of the year.

Though one can jump around in terms of choosing letters I am really just following it through. For the four weeks of April I have done N,O, P and Q.


If you have read earlier posts on my ALaW letters, for my first alphabet I have chosen to work in brass and to use the foldforming technique for letters with straight lines; and beaten, engraved and stamped approaches for letters with curves. So this month one foldform and three beaten, stamped and engraved (P) metal letters.

Saturday, May 1, 2010

Rusted metal bower

For quite sometime I have wanted to create a rusted rod bower similar to those made by the the Satin Bower Birds in our neighbourhood. Of course the birds use twigs - much more organic and ephemeral.

After building the house we had a reasonable amount of rusted reinforcing rod that the builder was going to throw in the rubbish tip. Of course I rescued it and it has been continuing to rust away nicely. I decided to construct the bower as part of the body of work I am making for the Lucas Parklands exhibition in June.


As you can see from the photos the project started with a lot of random length rods bent to different angles using a fence post to create a reasonably consistent sized bend. The rods all had to be tied together with rescued rod tie wire - I wanted the whole thing to have an organic feel about it - welding it together would make it too engineered.


The other two photos above show where I have managed to get so far - the bower is basically finished - but it needs fine tuning as they say - that means straitening, more tying etc.
I plan to make some enameled blue pieces for the base of the bower. The photo with the sun shining shows off the colour of the rusted better.